

How to Get Picture-Perfect Blush Nails

Flirty, feminine, and oh-so-photogenic - blush nails are taking over social media feeds and nail art inspiration boards with their dreamy, romantic vibe. This trending technique creates an ombré fade between two nail polish colors, one deeper and one lighter, for a soft and diffused look. Mastering the blended gradient results in a manicure that looks professionally done.
Getting that seamless fade all on your own can take a bit practice. But the good news is that with the right polishes, tools, and techniques, DIY blush powder nails or gel nails are totally achievable at home.
Here is a comprehensive, step-by-step guide to becoming your own blush nails pro. We cover everything from selecting striking color combos to blending them to perfection to taking care of your manicure so it lasts. Let’s dive in!
What Exactly Are Blush Nails?
Also sometimes called “blushing nails,” this trend plays off classic ombré nails but with an extra romantic, ethereal vibe. The look starts with a bolder base color that graduates into a lighter, more shimmery sheer tone on the tips. It’s almost as if the nails themselves are lightly blushing.
Rather than a stark line or demarcation between the two polish shades, the colors seamlessly fade together in a hazy gradient. This diffused effect feels fresh, modern, and almost otherworldly while still making an artistic statement.
No wonder blush nails are becoming the biggest nail art and manicure trend for 2023 on social media and beyond. And the great news is that while they look complicated, the technique itself isn’t too hard to master at home with the right guidance!
Read: How to Do Glazed Donut Nails
Why Is Everyone So Obsessed with Blush Nails?
It’s easy to see why the blush nails craze is sweeping Instagram feeds and taking over spring nail ideas. This manicure has all the makings of a huge trend:
- It’s Ultra Feminine – From the romantic color pairings to the soft, blended effect, blush nails exude delicate style. They’re the perfect manicure to get in a flirty mood for date night or springtime.
- Major Artistic Impact – Don’t let the fuzzy gradient fool you. Blush nails make a huge visual statement, catching eyes from across the room. The striking color combos and flawless execution demand attention.
- So Photogenic – One glimpse at the #blushnails hashtag shows why social media and influencers adore this look. Blush nails photograph beautifully from every angle thanks to their vivid colors and that striking yet soft contrast.
- Fully Customizable – While pink and red make classic blush nail polish choices, the possibilities are endless. Go bold or neutral, traditional or unexpected - this manicure adapts to any personal style.
With all these winning factors, it’s no wonder blush nails are blowing up online and IRL. Now let’s get you ready to recreate this gorgeous look yourself!
Gather Your Nail Blush Supplies
Doing your own blush dip powder nails or gel polish at home takes the proper products and tools. Before getting started, be sure you have proper nail products:
Base Preparation Must-Haves
- 100% acetone nail polish remover - to remove old manicures
- Nail file and buffer - for shaping nails
- Cuticle pusher and nipper - to neatly trim excess skin
- Hydrating cuticle oil - to condition the nail area
- Base coat - to protect nails from staining
Blush Creation Essentials
- Two nail polishes in different finishes
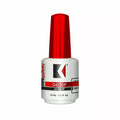
- Deeper creme shade
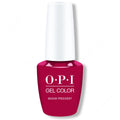
- Lighter sheer/shimmery shade
- Small detail nail art brush
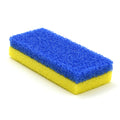
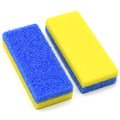
- Makeup wedge sponges - to seamlessly blend tones
- Top coat - for long-lasting shine and durability
- LED curing lamp - if using gel polishes that require setting
With the right blush nail supplies assembled, let’s get these nails in shape!
Prep Your Nails for Blush Manicure Success
Every good manicure starts with proper nail and cuticle care, which allows for the smoothest polish application. Follow these pre-mani steps:
- If you currently have nail polish or gel on your nails, remove it thoroughly with 100% acetone. Be sure to breakdown any remaining traces of color on the nails.
- Next, thoroughly wash hands with soap and water, then use a cuticle pusher to gently nudge back any overgrown cuticles from the nail bed. This prevents them from getting stained later.
- Once cuticles look neat, use cuticle nippers to carefully trim off any excess dead skin. Never cut into living skin.
- File nails to your desired length and shape using a standard emery board. Squoval and rounded shapes work well for showing off blush nail designs.
- Buff the nails lightly to remove surface shine so polish adheres better.
- Use a cuticle oil pen to hydrate the nail beds and surrounding skin, preventing future hangnails.
- Finish by applying a base coat onto each nail. Allow it to dry before moving onto polish.
Curate Your Dream Blush Color Pairing
Now for the fun part - selecting those perfect blush nail polish shades! The deeper creme and lighter shimmer should complement yet contrast each other.
Popular combo ideas include:
- Pale Pink + Cherry Red – This classic take channels Korean blush nails with a bright pop of color that fades into sweetness.
- Frosted Sheer White + Navy Blue – For an edgy and unexpectedly vampy manicure moment.
- Shimmering Gold + Forest Green – Make a bold yet glam statement by blending jewel tones.
- Nude Sheer Beige + Chocolate Brown – This warmer neutral look flatters all skin tones.
Some tips for choosing colors:
- Pick a deep shade 1-2 shades darker than your natural nail beds to make them “pop” against the lighter polish.
- Metallic and shimmers make stunning sheer shades since they capture and reflect light beautifully. Their glow enhances the airbrushed effect.
- If you already have an iridescent top coat you love, use any rich creme for the base color.
- Browse blush nails images on Pinterest or Instagram for more polish pairing ideas. The possibilities are endless!
Master the Two-Tone Blending Technique
Here comes the fun part - using those two polishes to create flawless blush gel nails or dip powder nails. Follow these steps:
- Start by painting the deeper creme shade onto every nail except your ring finger. Apply two even coats and ensure full coverage, then cure/let them dry completely.
- Next, choose your ring finger to be an accent nail that helps the rest of the manicure “pop.” Paint on two coats of the lighter sheer polish to only this nail and cure/dry.
- Moving back to the other nails, use a small detail art brush dipped in the lighter shade to paint a thin line across the tip of each nail, leaving a slight gap next to your cuticles and the sides.
- Dip a makeup sponge into acetone to lightly dampen it, then dab it into the sheer polish shade. Carefully start stippling it onto the nail tips right up to their demarcation line, softly diffusing the tones together in the center.
- Work across nails, using clean sponge sections for each one. Blend until you achieve a perfectly seamless, hazy ombré fade rather than a harsh line between polishes.
- Finish by applying a glossy top coat to all nails, including the accent, to seal and protect your design. Cure a final time.
Don’t Forget Those All-Important Finishing Touches!
You did it - those nails now beautifully rock the blush effect! But a manicure is never complete without final flourishes:
- Use a small detail brush dipped in acetone to gently tidy up any polish on your skin or cuticles. Work slowly to avoid erasing your gradient.
- Apply cuticle oil around the nails with the brush wand or massage in with fingertips. This conditions them to avoid future hangnails.
- Finally, show off your long-lasting blush korean nail art or powder nails on social media! Others will be begging for your DIY secrets.
Latest: Is Polygel Good for Your Nails?
Keep That Blush Manicure Looking Fresh!
You put time, effort, and artistry into perfectly executing those blush dip nails or gel polish ombré nails. Follow these care tips to make them last:
- Always wear gloves when doing wet household tasks. Exposure to water can cause blushing nail polish to chip faster.
- Try to open packages, buttons, and other fiddly items with the sides of your nails, not the tips where polish could get scratched off.
- Reapply cuticle oil daily to keep the nail area happy and conditioned, preventing cracks and smudges.
- When it's eventually time for a change, avoid roughly ripping off polish layers. Instead, use acetone-soaked cotton balls to gently dissolve the colors away. This avoids damaging nails.
Change Up Your Blush Nails Game!
One of the best things about blush nails is you can customize and update them anytime simply by choosing new colors! Have fun playing with different polish pairings. Why not try:
- A vibrant purple base that fades into periwinkle blue for an unexpected color play
- Using glitter or shimmer polishes rather than cremes for a more festive and flashy manicure
- Painting on delicate flowers or stripes with nail art polish over the ombré for extra cute embellishment
- Visiting your local nail salon and treating yourself to fancy gel or dip powder blush nails
You can also adapt this technique with deeper and lighter shades of any color under the rainbow. The options for putting your own spin on blush jelly nails or powder nails are endless.
Have fun with it and enjoy all the photos your gorgeous gradient manicure will rack up!
Sample Block Quote
Nam tempus turpis at metus scelerisque placerat nulla deumantos sollicitudin delos felis. Pellentesque diam dolor an elementum et lobortis at mollis ut risus. Curabitur semper sagittis mino de condimentum.