


How to Shape Nails for Beginners: A Comprehensive Guide

Having beautifully shaped nails can make a huge difference in the overall polished look of your hands. You can easily make your nails beautiful with any shape you want such as almond shaped nails, and square nails etc. With some basic tools and a bit of practice, you’ll be shaping your nails at home like a pro. This beginner’s guide " How to Shape Nails for Beginners" covers all the steps and tips you’ll need to get salon-worthy nails!
Step By Step Guide to Shape Nails
1. Start by Gathering the Nail Shaping Essentials
Before you begin shaping, you need to collect the key nail tools that will help you safely and effectively transform your nails:
Nail File – Look for a file with varying grit sizes or coarseness levels. Emery boards are the simplest, but metal files with changeable surfaces are ideal. Start with a more gentle 180 to 240 grit surface so you can avoid removing too much length while learning.
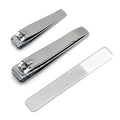
Nail Clippers – You’ll need these to trim nails before shaping the length. Choose a style with curved blades to easily follow the nail’s edge.
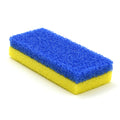
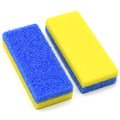
Buffer Block – Use this multi-sided block after filing to soften any rough edges.
Cuticle Pusher – This handy tool lets you neatly nudge back and tidy up your cuticles before shaping.
Nail Brush – Gently scrub underneath nails with a brush and soapy water before starting. Removing dirt and oil helps files and buffers glide smoothly across the surface.
These five products form a nail care starter kit that will make shaping easy for any beginner!
2. Trim Nails Before Shaping
Start by trimming your nails to the approximate length you want with the clippers. Don’t stress over precision at this point. Just remove any excessive length or snags extending well beyond your fingertips.
Leave nails ever so slightly longer than your finished length to allow room for shaping. If you trim too short initially, you limit what’s possible for the shape. Feel free to trim Conservatively at first – you can always remove a tad more length later!
3. Use Cuticle Tool to Push Back and Tidy
Next, use your cuticle pusher tool to neaten the area around and underneath the nails. Gently press back any overgrown cuticles, clearing space between the skin and your nails.
Having defined cuticles framing the nails not only keeps your hands looking well-manicured, but also lets you achieve the ideal tapered shape when filing. Don’t cut cuticles though! Just a gentle nudge is enough at this stage.
4. Shape Side Corners and Tip with Downward Strokes
Now you’re ready to shape using your nail file! Many beginners make the mistake of aggressively filing back and forth across the nail. This weakens the layers and risks cracking.
Instead, use smooth, downward scraping strokes in one direction, rotating around the nail. Work methodically around the side corners first at a 45 degree angle. Then gently file straight across the nail tip to define length.
5. Check Your Work Frequently
Pause frequently as you file to check symmetry and ensure you aren’t removing more length from one side. Turn hands slowly to inspect from all angles. Don’t worry about perfection yet!
Simply focus on softly blending side corners into an oval tip. If nails become pinned or misshapen, soak in water to soften before gently re-filing. Stay patient with checking your work - this attentiveness is vital for nail health.
6. Refine Shape by Lightly Filing Center
Once side corners follow a natural oval shape at the edges, lightly file across the nail centers. Apply feather-light pressure here; the goal is just subtly smoothing and refining. This connects the shaping you did on the sides into an even curve.
Remember – skip sawing back and forth. Instead maintain that same downward filing angle and direction across the entire nail. Frequently stop to check shape symmetry.
7. Smooth Surface and Soften Corners
As you file, nails will lose their shine and feel rough. Use a buffer block to restore a gentle sheen. Buff gently over nails like you’re polishing them. Quick, light buffs work better than heavy pressure.
Pay extra attention to the side corners and tip, often the thickest and most rigid areas. Buffing softens these parts last. Don’t buff too thin along the underside though or you risk weakening structural integrity.
8. Check Cuticles and Gently Push Back Again
Give cuticles another glance after all that filing and buffing. Often, debris gets pushed into the nail folds. Use your cuticle pusher to edge it away and define the well-groomed nail perimeter.
You can also gently push cuticles back again if they seem to be creeping forward. Just don’t cut them – that comes later when you have more experience!
9. Rinse Away Dust for a Finished Look
Finally, thoroughly scrub nails with your brush under warm, soapy water. Rinse away any accumulated nail dust and condition the nails and cuticles. Pat hands dry with a soft towel.
Once you master these fundamental techniques, it just takes regular practice to shape nails like an expert! Be patient with yourself as you build competency. Don’t rush the process.
Before long, you’ll have salon-worthy nails any professional would be proud of – all done in the comfort of your own home!
Conclusion
Shaping your own nails may seem intimidating as a beginner, but with the right tools and techniques, you can learn to do it just as well as the pros. You can easily buy the perfect and high quality tools at Nail Capital USA to shape your nails. Always remember to work slowly and carefully as you trim, file, and buff your nails into the desired shape. Take the time to regularly check your progress from all angles so you achieve symmetry. Don’t rush through any steps—neatly groomed nails are the result of patience and diligence.
It’s also important not to neglect general nail care and maintenance between shaping. Keep nails hydrated with moisturizer and consider supplements to strengthen them from within. Protect your hands while doing household chores so nails don’t crack or snag. Resist the urge to nervously pick or bite nails, which derails shaping efforts. Remember, the joy is in the shaping journey itself!Sample Block Quote
Nam tempus turpis at metus scelerisque placerat nulla deumantos sollicitudin delos felis. Pellentesque diam dolor an elementum et lobortis at mollis ut risus. Curabitur semper sagittis mino de condimentum.