

Step-by-Step Tutorials for Popular Nail Art Techniques

Tired of plain old nail polish? Forget this boring style! Your next work of art could be sparkling right on your fingers. Nail art isn't just chipped polish and stickers anymore – it's like super cool paintings for your fingertips! You can do swirls, Almond shaped nails, sparkles, and all sorts of fancy stuff, just as creative as any artist with their big brushes. But if you're new to it, all those fancy techniques might seem scary. Don't worry! This blog is your secret guide to becoming a nail art master.
We'll show you how to do popular nail art tricks like marbling, where colors mix and swirl like magic rainbows. We'll break down everything into super easy steps, so you can paint awesome designs right at home, no fancy salon needed.
Top Marbling Like Popular Nail Art Techniques
Following are most popular Nail Art Techniques:
Water Marbling Magic
This mesmerizing technique creates swirling patterns that resemble, you guessed it, marble! Choose contrasting or complementary colors for a vibrant effect.
Materials
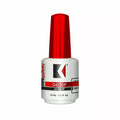
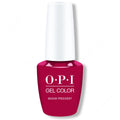
- White base coat
- Nail polishes in 2-3 desired colors
- Bowl of room-temperature water
- Toothpick or cuticle pusher
- Nail art brush (optional)
- Top coat
Steps
Prep your nails: Apply a base coat and let it dry completely.
Color droplets: Drizzle drops of polish onto the water's surface, alternating and overlapping colors for a dynamic look. Don't wait too long, or the polish will spread too much.
Swirl it up: Gently drag a toothpick or cuticle pusher through the polish to create mesmerizing swirls and veins. The lighter you touch, the finer the marbling.
Nail dip: Dip your fingertip into the water, making sure the entire nail makes contact with the marbled design. Hold for a second, then lift it slowly, letting the excess polish slide back into the water.
Clean-up: Use a cotton swab dipped in nail polish remover to clean up any polish smudges around the cuticles.
Shine and protect: Finish with a generous layer of top coat to seal the design and add shine.
Gradient Nail Art
This technique seamlessly blends two or more colors for a subtle yet sophisticated ombre effect.
Materials
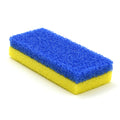
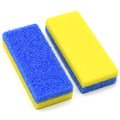
- Sponge wedge (makeup sponge cut into small squares)
- Nail polish in 2-3 blending colors
- Base coat, top coat
- Nail polish remover
Steps
Base Buddies: Apply a base coat to even out your nail surface. Choose a light or neutral color as your starting point.
Rainbow Bridge: Pick 2-3 nail polishes that blend well together for a smooth gradient. For a sunset vibe, try orange to pink; for an ocean feel, teal to blue.
Sponge Savvy: Grab a makeup sponge. Cut it into smaller wedges for better control. Squeeze a dollop of each polish onto a plastic plate, ensuring they touch slightly.
Dabbing Delight: Dab the sponge into the polishes, blending the colors slightly on the sponge itself. Gently dab this spongy rainbow masterpiece onto your nails, starting at the tip and working your way up. Repeat until you achieve your desired color intensity.
Clean Cut: Use a cotton swab dipped in nail polish remover to clean up any stray polish around your cuticles.
Shine On: Seal your gradient glory with a top coat for extra pop and protection.
Stamping Nail Art
This method uses pre-designed plates and a stamper to transfer intricate patterns onto your nails.
Materials
- Stamping plate with desired design
- Stamping polish (thicker consistency than regular polish)
- Stamper and scraper
- Base coat, top coat
- Nail polish remover
Steps
Prep your nails: Apply a base coat and let it dry.
Prep the plate: Apply a thin layer of stamping polish onto your chosen design on the plate. Scrape off excess polish using the scraper at a 45-degree angle.
Pick it up: Press the stamper firmly onto the design, ensuring complete transfer.
Stamp it on: Roll the stamper onto your nail, applying gentle pressure. The design should transfer seamlessly.
Repeat and refine: If needed, repeat the stamping process for each nail. Clean up any smudges with nail polish remover and a cotton swab.
Seal the deal: Apply a top coat for a flawless finish.
Water Decals
Water decals nail art is a technique that involves applying pre-designed stickers onto nails. These decals come in a variety of designs, such as flowers, animals, and geometric patterns. Applying water decals is a quick and easy way to achieve a professional-looking manicure.
Supplies
- Water decal stickers (choose your desired designs)
- Shallow dish filled with lukewarm water
- Tweezers
- Cotton swabs
- Base coat and top coat
Steps
Prep and prime: Apply a base coat and let it dry.
Peel and soak: Carefully peel off your chosen decal from the sheet using tweezers. Submerge it in the water for 10-15 seconds.
Slide and smooth: Gently slide the decal off the backing paper using your finger and onto your nail. Adjust the position as needed.
Press and blot: Use a cotton swab to gently press the decal onto your nail, smoothing out any wrinkles.
Seal the deal: Once dry, apply a top coat for extra durability and shine.
Stamping Sensation
Stamping Sensation nail art is a popular technique that involves transferring pre-designed patterns onto nails. The process involves using a stamper and plates that contain various designs. The stamper is used to pick up the design from the plate and apply it to the nail, creating a unique and intricate look.
Materials
- Stamping plate
- Stamping polish
- Stamper and scraper
- Base and top coat
Steps
Prep your nails: Apply a base coat and let it dry completely.
Apply stamping polish: Apply a thin layer of stamping polish to your chosen design on the stamping plate.
Scrape the excess: Use the scraper to remove excess polish from the design, ensuring only the grooves are filled.
Pick it up: Gently press the stamper onto the design, picking up the pattern.
Stamp it on: Roll the stamper across your nail, transferring the design. Apply light pressure for a clean transfer.
Repeat &clean up: Repeat steps 2-5 for each nail. Once done, apply a top coat for protection and shine.
Conclusion
Nail marbling is a mesmerizing technique that allows for endless creativity and unique designs. With this step-by-step guide, you can embark on a journey of self-expression, turning your nails into miniature works of art. Experiment with different color combinations and swirling techniques to discover your signature marbled style. Style your nails with amazing nail products and accessories from Nail Capital USA.
Sample Block Quote
Nam tempus turpis at metus scelerisque placerat nulla deumantos sollicitudin delos felis. Pellentesque diam dolor an elementum et lobortis at mollis ut risus. Curabitur semper sagittis mino de condimentum.